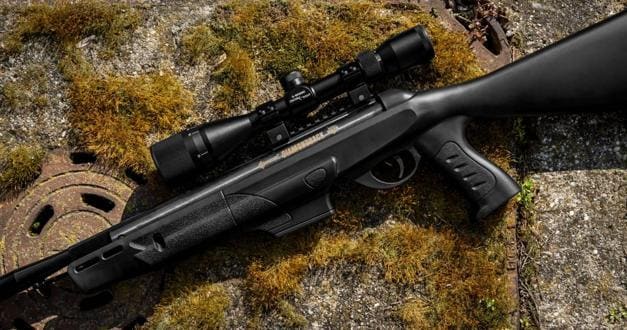
How do you mount a scope to a air rifle and position it correctly?

Even the most experienced shooters can find it difficult to accurately hit a distant target without the right optics. For this reason, it is worth investing in a spotting scope for air rifles, which will significantly improve accuracy and comfort when shooting at longer distances. The rifle scope should be securely attached to the windsock using suitable mounts to avoid play and possible damage to the optics.
In this guide, we will take you through all the necessary steps you need to follow to properly mount a scope to your windsock. We will also give you tips on how to set up your scope to shoot accurately.
Which scope mount to choose?
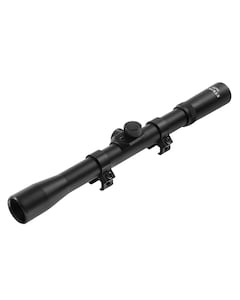
In order to attach a spotting scope to a air rifle, you need to equip yourself with a suitable mount. Although some scopes are sold with a mount included, most require you to purchase one separately. It is also important that your windsock is equipped with a rail on which to mount the mount. Mounting rails can vary, so be sure to check exactly what type of rail you have, even before purchasing a mount.
Nowadays, at least several design varieties of montages can be found:
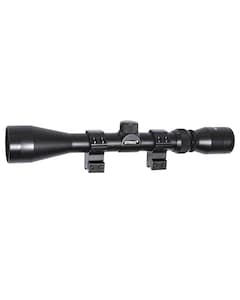
1. Two-part assembly - consists of two horizontally split rings. Each ring is separately screwed to the rail. These types of mounts are most commonly used on PCP, CO2-fuelled airguns or spring-loaded carbines with a low initial velocity. Two-piece mounts with double screws are also suitable for more powerful carbines. Their disadvantages, however, include:
- Less stability – compared to one-piece mounts, which offer greater stability, a two-piece mount can be less robust, especially with more powerful windguns with a higher initial velocity.
- More adjustment points – more components means more points that may come loose during use. It may be necessary to check the screws more frequently.
- Alignment problems – if the mount is not aligned precisely, alignment problems may occur, which will affect accuracy.

2. One-piece assembly – the lower halves of the rings and the base that is bolted to the rail form an integral whole, made from a single piece of metal. These types of mounts are typically used on medium and high-powered spring-loaded windcheaters, as they cover the air rifle's rail or frets over their entire surface, providing a much tighter clamp. This ensures that the mount, along with the sight, does not move along the rail, which prevents the sight from becoming unsettled.

We also divide assemblies into: low, medium and high. The choice of mounting height depends on the diameter of the telescope lens:
- spotting scopes with up to 32 mm objective - low mount,
- spotting scopes with up to 44 mm objective - medium mount,
- spotting scopes with a larger objective - high mount.
However, please note that this is not a rigid rule. If a 33mm scope has a parallax adjustment, this can add an extra millimetre to the scope's diameter, so a low mount may not be sufficient. Therefore, if you want to be 100% sure that a particular mount will be suitable for the scope you have purchased, you should pre-screw the mount to the rail or cutter and place the optical scope on it to check that the distance is sufficient.
When selecting a mount for a spotting scope, it is also important to pay attention to the diameter of the tube. Always choose a mount with a diameter that corresponds to the diameter of the tube.


Mounting a spotting scope on an air rifle - step by step
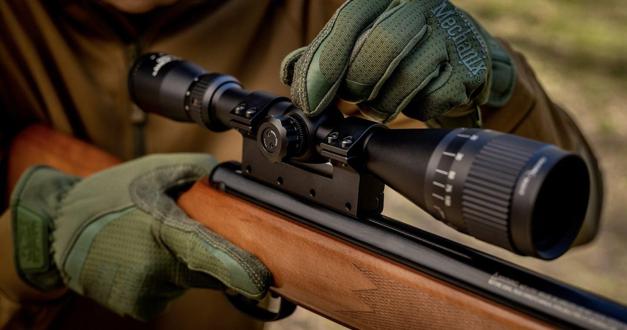
If you have already chosen a mount, you can proceed to mount the optical sight on the air rifle. The first step is to fully unload the air rifle. For proper mounting you will need:
- clean cotton cloth,
- gun oil,
- scope mount,
- telescope,
- allen spanners (usually included with the assembly).
Before proceeding, the rail on which the sight is to be mounted, especially the cutters, should be thoroughly wiped down with a cloth.
And now we show you step-by-step how to mount a scope on a rifle scope:
1. To begin with, the mount needs to be unscrewed (the upper parts of the scope mount are put aside for now), the screws that secure it loosened and the mount put on the milled rail. In the case of a one-piece mount, it is sufficient to tighten it firmly to the rifle, but of course so as not to break the thread. In the case of a two-part assembly, the rear module is screwed on first and then the front part, maintaining a distance of 10 to 12 cm between the mounts (depending on the size of the sight).
2. To focus the viewfinder, look closely through the viewfinder (your eye should be between 5 and 10 cm away depending on the viewfinder) at a white surface and spin the eyepiece until the crosshairs are sharp.
3. Then place the scope on the mount (taking care to place the scope correctly - with the eyepiece to the shooter's eye), attach the upper elements and twist them slightly (just slightly enough to be able to move and rotate it freely without scratching the surface of the tube). To prevent scratching the tube, you can tape it with insulating tape or self-vulcanising tape. The crosshair adjustment screws should be located between the mounts.
4. Ensure that the arms of the crosshair are in the correct position. Simply aim at a distant vertical target - a line (e.g. a building or a pillar) and rotate the sight until the crosshairs catch the vertical. It is important that the air rifle is horizontal, i.e. that the bed is parallel to the ground.
5. When everything has been set we tighten the screws evenly. Put on the top parts of the clamp and tighten firmly, but so as not to damage the threads.
Watch our video to see how to properly mount a scope on a air rifle!
How do I set up the scope on my air rifle?
Before zeroing the scope, check that there is no shot in the barrel. In order to be able to make adjustments, the covers located about halfway along the scope must be pulled off. In the case of a spotting scope with a zoom, a minimum magnification and a focus setting of 15 metres is sufficient for the time being (if the scope has a lens adjustment, i.e. is with variable parallax).
After shooting several times at a target (preferably a large area), the results should be checked and then the distance of the focus of the shots from the point you were trying to hit should be measured. In most cases, simple rules apply:
- hit too high - the top knob is turned in the ‘DOWN’ direction (the hit point is lowered),
- hit too low - the top knob is turned in the ‘UP’ direction (raises the hit point),
- hit too far to the right - the side knob is turned in the ‘LEFT’ direction (the hit point is moved to the left),
- hit too far to the left - pokrętło boczne przekręcamy w kierunku "RIGHT" (przesuwa się punkt trafienia w prawo).
Spotting scopes from reputable companies are equipped with finger-friendly knobs, with which adjustments can be made without any tools. The crosshairs must be moved to the desired position, bearing in mind that each click shifts the point of impact of the shot by the value indicated on the bolt - an individual value for each scope (indicated on the bolts for adjusting the crosshair settings - usually 1/4’ at 100 yards, 100 yards ~ 91.4 m).
Some spotting scopes have been equipped with an illuminated crosshair (usually there are several degrees of intensity adjustment). The potentiometer is located on the front of the scope. They are powered by 3V lithium batteries (type CR 2032). Batteries should be inserted ‘+’ upwards.
Watch our video for tips on adjusting your scope!