Hemorrhage control — why every second counts?
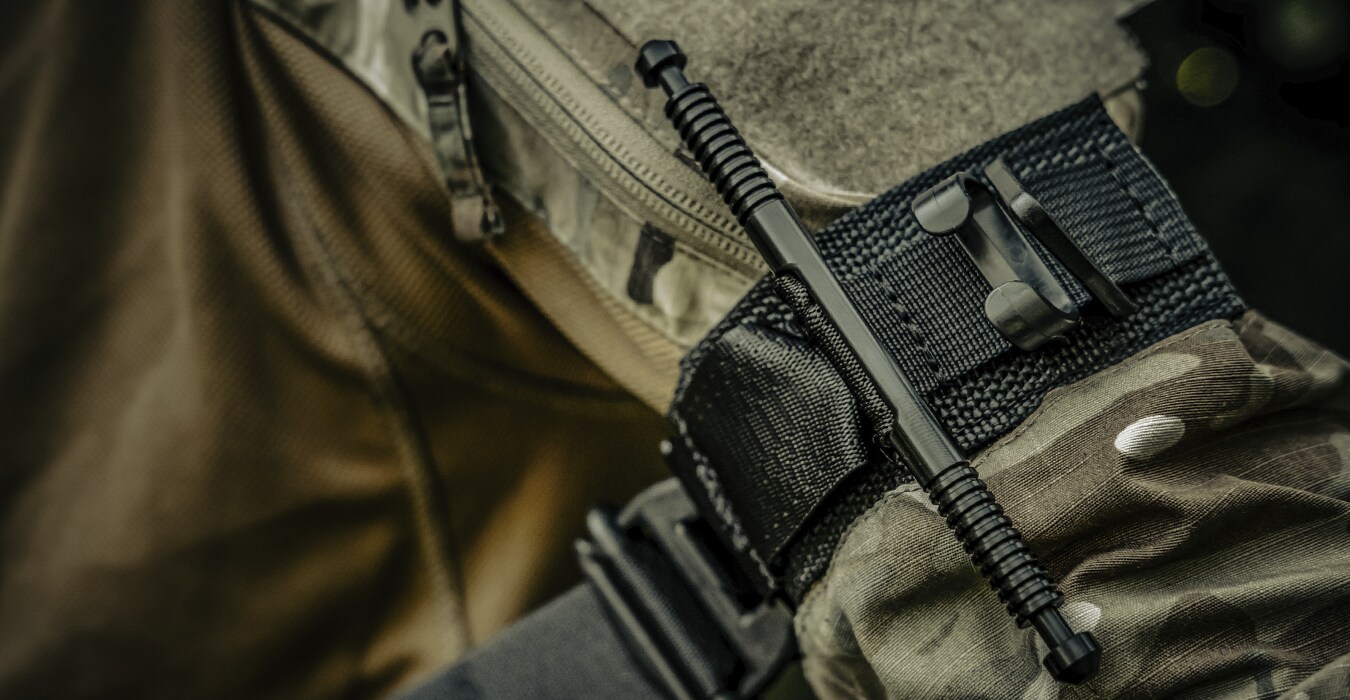
How to stop hemorrhage? It is worth knowing the answer to this question even before a life-threatening situation occurs. Uncontrolled loss of a large amount of blood can lead to death in just a few minutes. It often happens faster than the medical rescue team can arrive on the scene. For this reason, the ability to recognize massive bleeding and start stopping it is one of the most important first aid skills.
The guide is aimed at anyone who wants to know how to react in case of a serious injury. Quick actions by a witness can limit blood loss and increase the casualty's chances of survival until emergency services arrive.
However, it is worth remembering that even a detailed guide cannot replace practical training. Applying a tourniquet and packing a deep wound are activities that are best practiced under the supervision of an instructor.
What is the difference between hemorrhage and bleeding?
Bleeding is a general term and simply means blood loss from damaged vessels. It can refer to both a minor cut and a life-threatening serious injury. The term "hemorrhage" is most often used in reference to intense, rapidly progressing, or difficult-to-control blood loss.
Minor bleeding occurs, among others, as a result of abrasions, shallow cuts, and small wounds. It can usually be controlled by direct pressure and a simple dressing. However, the wound should be assessed by medical personnel if it is deep, heavily contaminated, contains a foreign body, or bleeding does not subside despite proper pressure.
Life-threatening hemorrhage can occur both after damaging an artery and a large vein. A first aider does not need to identify the type of vessel based on the color of the blood. In real conditions, the color and way it flows can be difficult to assess. The amount of blood, the speed of its loss, and the state of the casualty are much more important.
How to recognize life-threatening bleeding?
Massive bleeding can often be recognized within the first few seconds of assessing the situation. Concern should be raised by:
- blood spurting or flowing from the wound in a continuous stream,
- a quickly enlarging pool of blood,
- clothing heavily soaked in blood,
- blood accumulating in the sleeve, trouser leg, or shoe,
- bleeding that cannot be controlled with strong pressure,
- pallor, cold and clammy skin, weakness, confusion of the casualty, or loss of consciousness.
Do not waste time estimating the number of milliliters of blood lost. If the bleeding is rapid, constantly increasing, or the condition of the casualty is quickly deteriorating, it should be considered a direct threat to life, and action should be taken immediately.
First aid for hemorrhage – step by step procedure
1. Ensure your safety
Before approaching the casualty, make sure that the accident site is not dangerous. Pay attention to road traffic, fire, damaged electrical installations, unstable structures, and aggressive individuals.
Whenever possible, wear disposable gloves. They limit direct contact with blood. However, the absence of gloves should not cause a long delay in providing help in a direct life-threatening situation. A conscious casualty can be asked to press the wound themselves until a dressing is prepared.
2. Call for help
Call 112 or appoint a specific person to do it. Rather than shouting "someone call," directly address a chosen person and also ask them to bring the first aid kit.
When acting alone, activate the speaker mode and follow the dispatcher’s instructions while starting to control the bleeding. Provide exact location, number of casualties, type of injury, and information on performed actions.
3. Expose and locate the wound
Remove or cut the clothing around the injury enough to find the actual source of bleeding. Clothing may obscure the wound, and blood may flow along the body and accumulate elsewhere.
However, do not waste time completely undressing the casualty. The goal is to quickly find where the blood is coming from and apply pressure directly to the wound.
4. Apply direct pressure
Apply gauze, hemostatic dressing, or a clean, folded material to the wound. Then press down firmly and uninterruptedly. Pressure should be applied directly at the blood outflow point.
Maintain pressure until:
- bleeding completely stops,
- a tourniquet is successfully applied,
- action is taken over by another person or medical rescue team,
- the accident site becomes unsafe.
If the first gauze becomes soaked, do not remove it from the wound. You can add another layer on top and keep pressing firmly. However, do not apply many loose layers, as they may weaken the pressure. After controlling the bleeding, the dressing can be secured with a pressure bandage.
5. Pack the deep wound with dressing
In the case of a deep wound, especially in a location where a tourniquet cannot be applied, dressing material should be placed as close to the bleeding source as possible. This includes wounds in the groin, armpit, or shoulder girdle area.
You can use standard gauze or a hemostatic dressing for packing the wound. The material is gradually inserted into the wound’s interior and then strongly pressed the entire time. After packing, continue pressure according to the dressing manufacturer's instructions and secure everything with a pressure bandage.
A hemostatic dressing will not stop hemorrhage without appropriately strong pressure. The technique of wound packing requires practice, so it is best practiced in advance during training.
6. Apply a tourniquet for limb hemorrhage
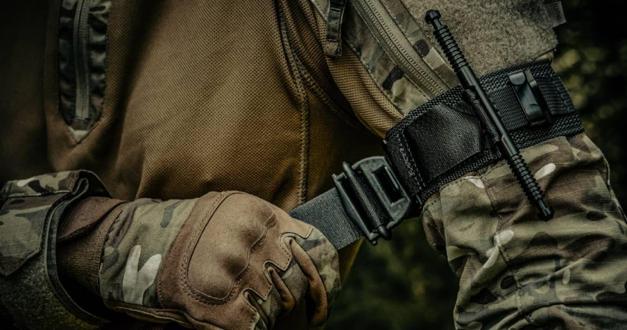
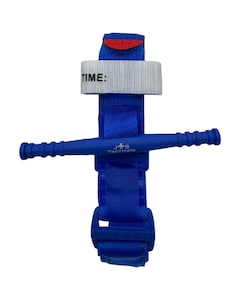
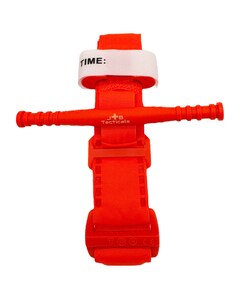
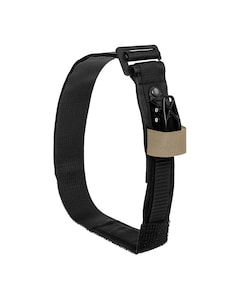
A tourniquet, also known as a stasis, is used for life-threatening hemorrhage from an arm or leg that cannot be controlled by direct pressure. It should be a dedicated tourniquet from a reliable source. Commercial models are easier to apply correctly and block arterial flow more effectively than improvised ones.
Apply the tourniquet about 5–7 cm above the wound, between the injury and the torso, but not directly on the knee or elbow. Tighten the strap as much as possible, then rotate the rod to completely stop the bleeding. The rod should be secured in its designated lock.
Correctly applied tourniquets usually cause significant pain. This is not a reason to loosen it. Write down the time of application in the designated space on the tourniquet. Do not remove or loosen it. Only medical personnel can do this.
If bleeding continues despite proper tightening, apply a second tourniquet above the first, closer to the torso. After application, always check whether the blood has indeed stopped flowing.


7. Observe the casualty and protect them from hypothermia
After controlling the bleeding, regularly monitor the casualty's consciousness and breathing. Lay them on their back if their condition, type of injury, and breathing allow. Do not routinely elevate the legs of a person after an injury. The benefit of such a position is short-lived and uncertain, and unnecessary movement can aggravate injuries.
Cover the casualty with a blanket, clothing, or emergency foil. Blood loss promotes hypothermia, even when the ambient temperature does not seem low. Do not leave the casualty alone and keep them informed about the actions you are taking.
If they lose consciousness and do not breathe properly, notify the dispatcher and begin resuscitation according to their instructions.
8. Do not remove an object embedded in the wound
If there is a knife, a piece of metal, glass, or another embedded object in the wound, do not try to remove it. It may partially restrict bleeding, and removing it may lead to sudden blood loss.
Press the tissues on either side of the object, not directly on it. Then surround it with dressing material and stabilize it in the position it is in.
Blue or black tourniquet – how do they differ and which to choose?
The color of the tourniquet may indicate its intended use, but this is not a universal rule for all manufacturers. Always check the marking of the specific model.
For original C-A-T tourniquets, the blue version is intended for repeated training. The black and orange versions are designed for actual rescue operations. The orange color increases the visibility of the tourniquet and makes it easier for medical personnel to quickly spot.
For exercises, it is advisable to purchase a separate training tourniquet. The tourniquet in the first aid kit should remain ready for use in a real event. Once used on a casualty, it is considered a single-use product and should not return to the equipment.
The color alone does not indicate the quality or authenticity of the product. When purchasing, pay attention to the manufacturer, markings, quality of workmanship, and seller credibility. Cheap fakes may look similar to original models but can break or loosen during tightening.
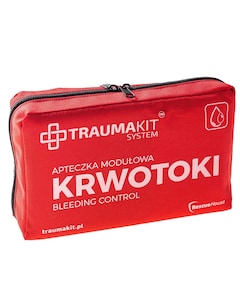
What should be included in the hemorrhage control kit?
The contents of the first aid kit should be tailored to the type of activity and the hazards encountered. In a basic kit designed for bleeding control, it is worth including:
- at least one factory tourniquet,
- gauze for wound packing,
- hemostatic dressing,
- pressure dressing (Israeli type),
- sterile compresses,
- nitrile gloves of the appropriate size,
- rescue scissors,
- elastic bandage,
- emergency foil or light blanket,
- marker to record the time of tourniquet application.
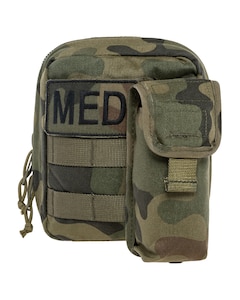
A good starting point is a ready-made tactical IFAK first aid kit compiled according to TCCC standards.
Common mistakes when controlling hemorrhage
Too weak or intermittent pressure
Pressing the wound with insufficient force may not be enough to control the hemorrhage. The same applies to frequently lifting the dressing to check if the bleeding has stopped. Pressure should be strong, constant, and applied directly to the blood source.
Delaying the call for help
Massive hemorrhage always requires urgent medical help. Even if the bleeding is stopped, the casualty may need surgery, a blood transfusion, or treatment of the damaged vessel.
Applying a tourniquet on a joint
Do not apply the tourniquet directly on the knee or elbow. It should be placed above the wound on a limb section that allows even pressure.
Applying the tourniquet too loosely
A loose tourniquet can limit venous blood outflow without blocking arterial inflow. This can worsen the bleeding and cause swelling. The tourniquet must be tightened until blood flow stops completely.
Loosening the tourniquet
Once a tourniquet is successfully applied, do not periodically loosen it. This can cause bleeding to resume. Medical personnel will decide whether to loosen or remove it.
Removing an embedded object
Removing the object can cause a sudden increase in bleeding. It should be left in place, tissues around it should be compressed, and it should be stabilized with a dressing.
Using equipment without knowing how to operate it
Having a tourniquet or hemostatic dressing does not guarantee effective help. Equipment should be learned and practiced in training or with appropriate training specimens beforehand.
Frequently Asked Questions (FAQ) – controlling hemorrhage
How long should the wound be compressed?
Pressure should be maintained until the bleeding completely stops, the tourniquet is successfully applied, action is taken over by another person, or the medical rescue team arrives. Do not constantly lift the dressing and check the wound.
What to do when the dressing becomes soaked with blood?
Do not remove the first layer from the wound. Maintain strong pressure and if necessary, place additional gauze on it. If the bleeding continues, use an appropriate method such as packing the wound or applying a tourniquet for limb hemorrhage.
Can someone without medical training use a tourniquet?
Yes. The tourniquet is also intended for providing first aid by incident witnesses. It's best to complete practical training beforehand, as proper tightening and assessing effectiveness require the right technique.
What to do if one tourniquet does not stop bleeding?
Check if it is tightened strongly enough. If despite this the blood continues to flow, apply a second tourniquet above the first, closer to the torso. Do not remove the first tourniquet.
Is it possible to use a belt or string as a tourniquet?
A factory tourniquet is safer and more effective than random materials. A narrow string can damage tissues, and a common belt often does not allow sufficient pressure. Without a tourniquet, primarily apply strong pressure, fill the wound, and follow the dispatcher’s commands with number 112.
Summary - first aid for hemorrhages
Massive hemorrhage can lead to death within minutes, so quick action by an incident witness is highly important. Once the scene is secured, call for help, locate the bleeding source and begin strong direct pressure.
For deep wounds, gauze or hemostatic dressing packing can be used. In the case of a life-threatening limb hemorrhage that cannot be controlled by pressure, a tourniquet should be applied. The tourniquet must be tightened until the blood stops completely, and should not be loosened after application.
After controlling the bleeding, continue to observe the casualty’s breathing and consciousness, protect them from hypothermia, and stay with them until emergency services arrive. Theoretical knowledge helps understand the sequence of actions, but practical training provides the confidence needed during an actual incident.