How to use a compass and map - basics of field navigation

In the age of widespread access to GPS, the ability to use a map and compass often seems unnecessary. However, it is worth remembering that technology can fail us when we least expect it. In such situations, traditional navigation methods can come to the rescue, as they enable us to find our way and reach our destination.
Read our guide and learn how to use a compass and map to effectively determine your walking direction in the field.
Orienting a map using a compass - why should you know how to do it?
Even in these days of widespread access to GPS and various online map apps, orienting a map using a compass is a very useful skill. The main advantage of traditional maps and compasses is that they do not require power.
In addition, when hiking in mountains or other remote areas, the GPS signal can sometimes be very weak or disappear altogether, making it impossible to use satellite navigation. Digital maps can also be out of date or contain errors. In these situations, it is useful to carry a map and compass with you to find your way without relying on technology. Orienting a map using a compass is also valuable for the sheer satisfaction of having this skill.
Orientation with a map and compass is a skill that is not only useful for various expeditions, it can also be essential in emergency situations. Natural disasters, industrial accidents or terrorist attacks can cause power cuts and restrict internet access, which in turn prevents the use of GPS navigation on electronic devices. However, even without access to modern technology, when you have a map, compass and the ability to use them, you are able to find your way and reach your chosen destination.


Using a map - basic knowledge and map elements
If you are going on a trip and don't want to rely solely on the navigation on your phone or other device, the first thing to remember is to choose a suitable map of the place you are going to.
This goes without saying - if you are heading to the Giant Mountains, for example, you need to choose a map that takes this region into account. However, you should know these basics first and foremost before you start mapping your way through the terrain:
1. Map scale
Map scale is a key piece of information that defines the ratio between the size of objects on a map and their actual size in the field. Scale information is usually displayed on the cover of the map or next to the map legend.
The scale is represented by a fraction written as 1: XXX, where XXX indicates how many times the terrain image has been reduced. The smaller the number in the denominator, the more detailed the map is.
Example: a scale of 1:10 000 means that 1 cm on the map corresponds to 100 metres in reality.

2. Levels
Also very important on the map are the horizons, i.e. the lines connecting points of the same height above (or below) sea level. Dense horizons indicate steep terrain, sparse horizons indicate gentle terrain. Bends in the contours represent valleys and ridges, and closed contours represent the tops of mountains. Strong indentations, on the other hand, denote ravines or steep ridge tops.
2. Cartographic grid lines
Cartographic grid lines are the vertical and horizontal lines that divide a map of the terrain into squares and allow a better orientation of the terrain. They are needed for orienting the map and determining the azimuth (direction of march).

How to use the compass correctly?
The most important component of a compass is the magnetic needle, which lines up with the Earth's magnetic field. Its red (usually this colour) end points in the north direction. It is worth knowing that the compass does not indicate the geographical pole, but the magnetic pole. At our latitude this discrepancy does not matter much, but in some countries it may be necessary to take a correction for this and correct the difference (this is called magnetic declination).
Read our advice on this, which compass to choose, in which we describe what magnetic declination is!

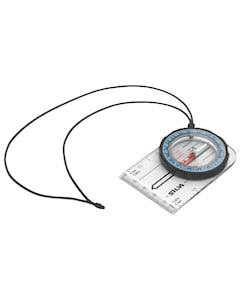
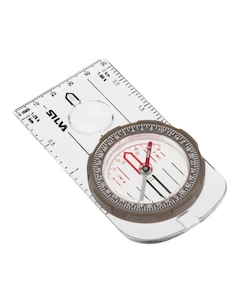
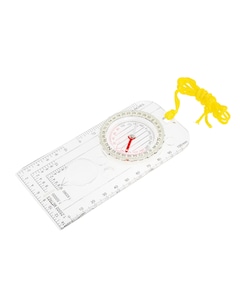
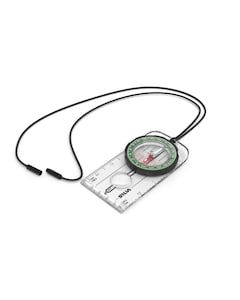
To use a compass to navigate with a map, it is best to choose a map compass that is equipped with a ruler. This will enable the compass to be aligned along a north-south line on the map.
Notice! If the compass is in the vicinity of metal objects, its operation may be affected. In addition, other magnetic sources such as mobile phones, magnets or electrical cables can also adversely affect the operation of the compass.
How do you effectively determine the direction of a march in the field?
Several steps are required to determine the direction of march.
1. Orienting the map
First of all, you have to ‘orient the map’, i.e. arrange it so that the world directions on the map are in line with reality and coincide with the compass directions. It is worth mentioning here that most maps (especially topographical and navigational) have conventional directions placed so that north on the map is at the top and south at the bottom. To orient the map, perform the following steps:
- Place the compass on the map so that it lies parallel to the cartographic grid line.
- Turn the compass dial (limbus) so that the auxiliary lines on the dial are parallel to the north-south lines on the map.
- Rotate the map with the compass on it until the magnetic needle points to the north ‘N’ marker on the dial.
Once you have completed these steps, your map will overlay the terrain.
2. Determining from where and to where you are going
Once you have oriented the map correctly, you need to determine the direction you want to go. Mark two landmarks with a pencil (or other writing instrument) - the one where you are and the other where you want to go.
Then connect the two points using a compass ruler. Apply the longer edge of the compass so that the two points are adjacent to it. The red directional arrow should be pointing towards the landmark you are aiming at.
3. Determining the azimuth on the compass
If you already have two points connected, start rotating the limbus (compass dial) so that the letter N on the dial coincides with the north indicated by the red magnetic needle. Make sure that the auxiliary lines on the compass dial are parallel to the cartographic grid lines on the map (vertical north-south lines). When these lines are parallel to each other, read the azimuth by looking at the directional arrow on the compass, clockwise.
Once you have established the azimuth, take the compass in your hand and hold it horizontally. Do not turn the ring and rotate around your axis in such a way that the magnetic needle coincides with the red guide lines on the ring. Now the directional arrow on the compass points you in the direction you need to go to reach the designated landmark.
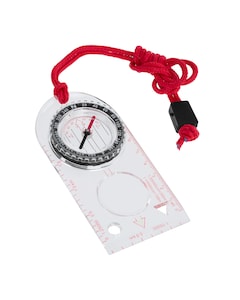
Compass range at Militaria.pl
At Militaria.pl, we offer a wide selection of compasses that will meet the expectations of even the most demanding users. All of the models we offer are characterised by their robust casing, which guarantees resistance to damage.
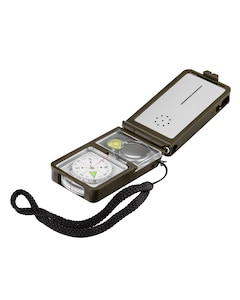
In our shop you will buy classic compasses, with illumination, with transparent housings and variants with additional functions such as a mirror or aiming instruments. We offer products from well-known and respected brands such as: Helikon, Silva, Badger Outdoor and Mil-Tec.